

Prerequisites
Before you begin, ensure you have the following:- An API key for LangSmith (free to sign up)
Setup local LangGraph server
1. Install the LangGraph CLI
2. Prepare your agent
We’ll use the following simple agent as an example:agent.py
3. Environment variables
Create a.env file in the root of your project and fill in the necessary API keys. We’ll need to set the LANGSMITH_API_KEY environment variable to the API key you get from LangSmith.
Be sure not to commit your
.env to version control systems such as Git!.env
4. Create a LangGraph config file
Inside your app’s directory, create a configuration filelanggraph.json:
langgraph.json
create_agent automatically returns a compiled LangGraph graph that we can pass to the graphs key in our configuration file.
See the LangGraph configuration file reference for detailed explanations of each key in the JSON object of the configuration file.
5. Install dependencies
In the root of your new LangGraph app, install the dependencies:6. View your agent in Studio
Start your LangGraph server:Safari blocks
localhost connections to Studio. To work around this, run the above command with --tunnel to access Studio via a secure tunnel.http://127.0.0.1:2024) and the Studio UI https://smith.langchain.com/studio/?baseUrl=http://127.0.0.1:2024:
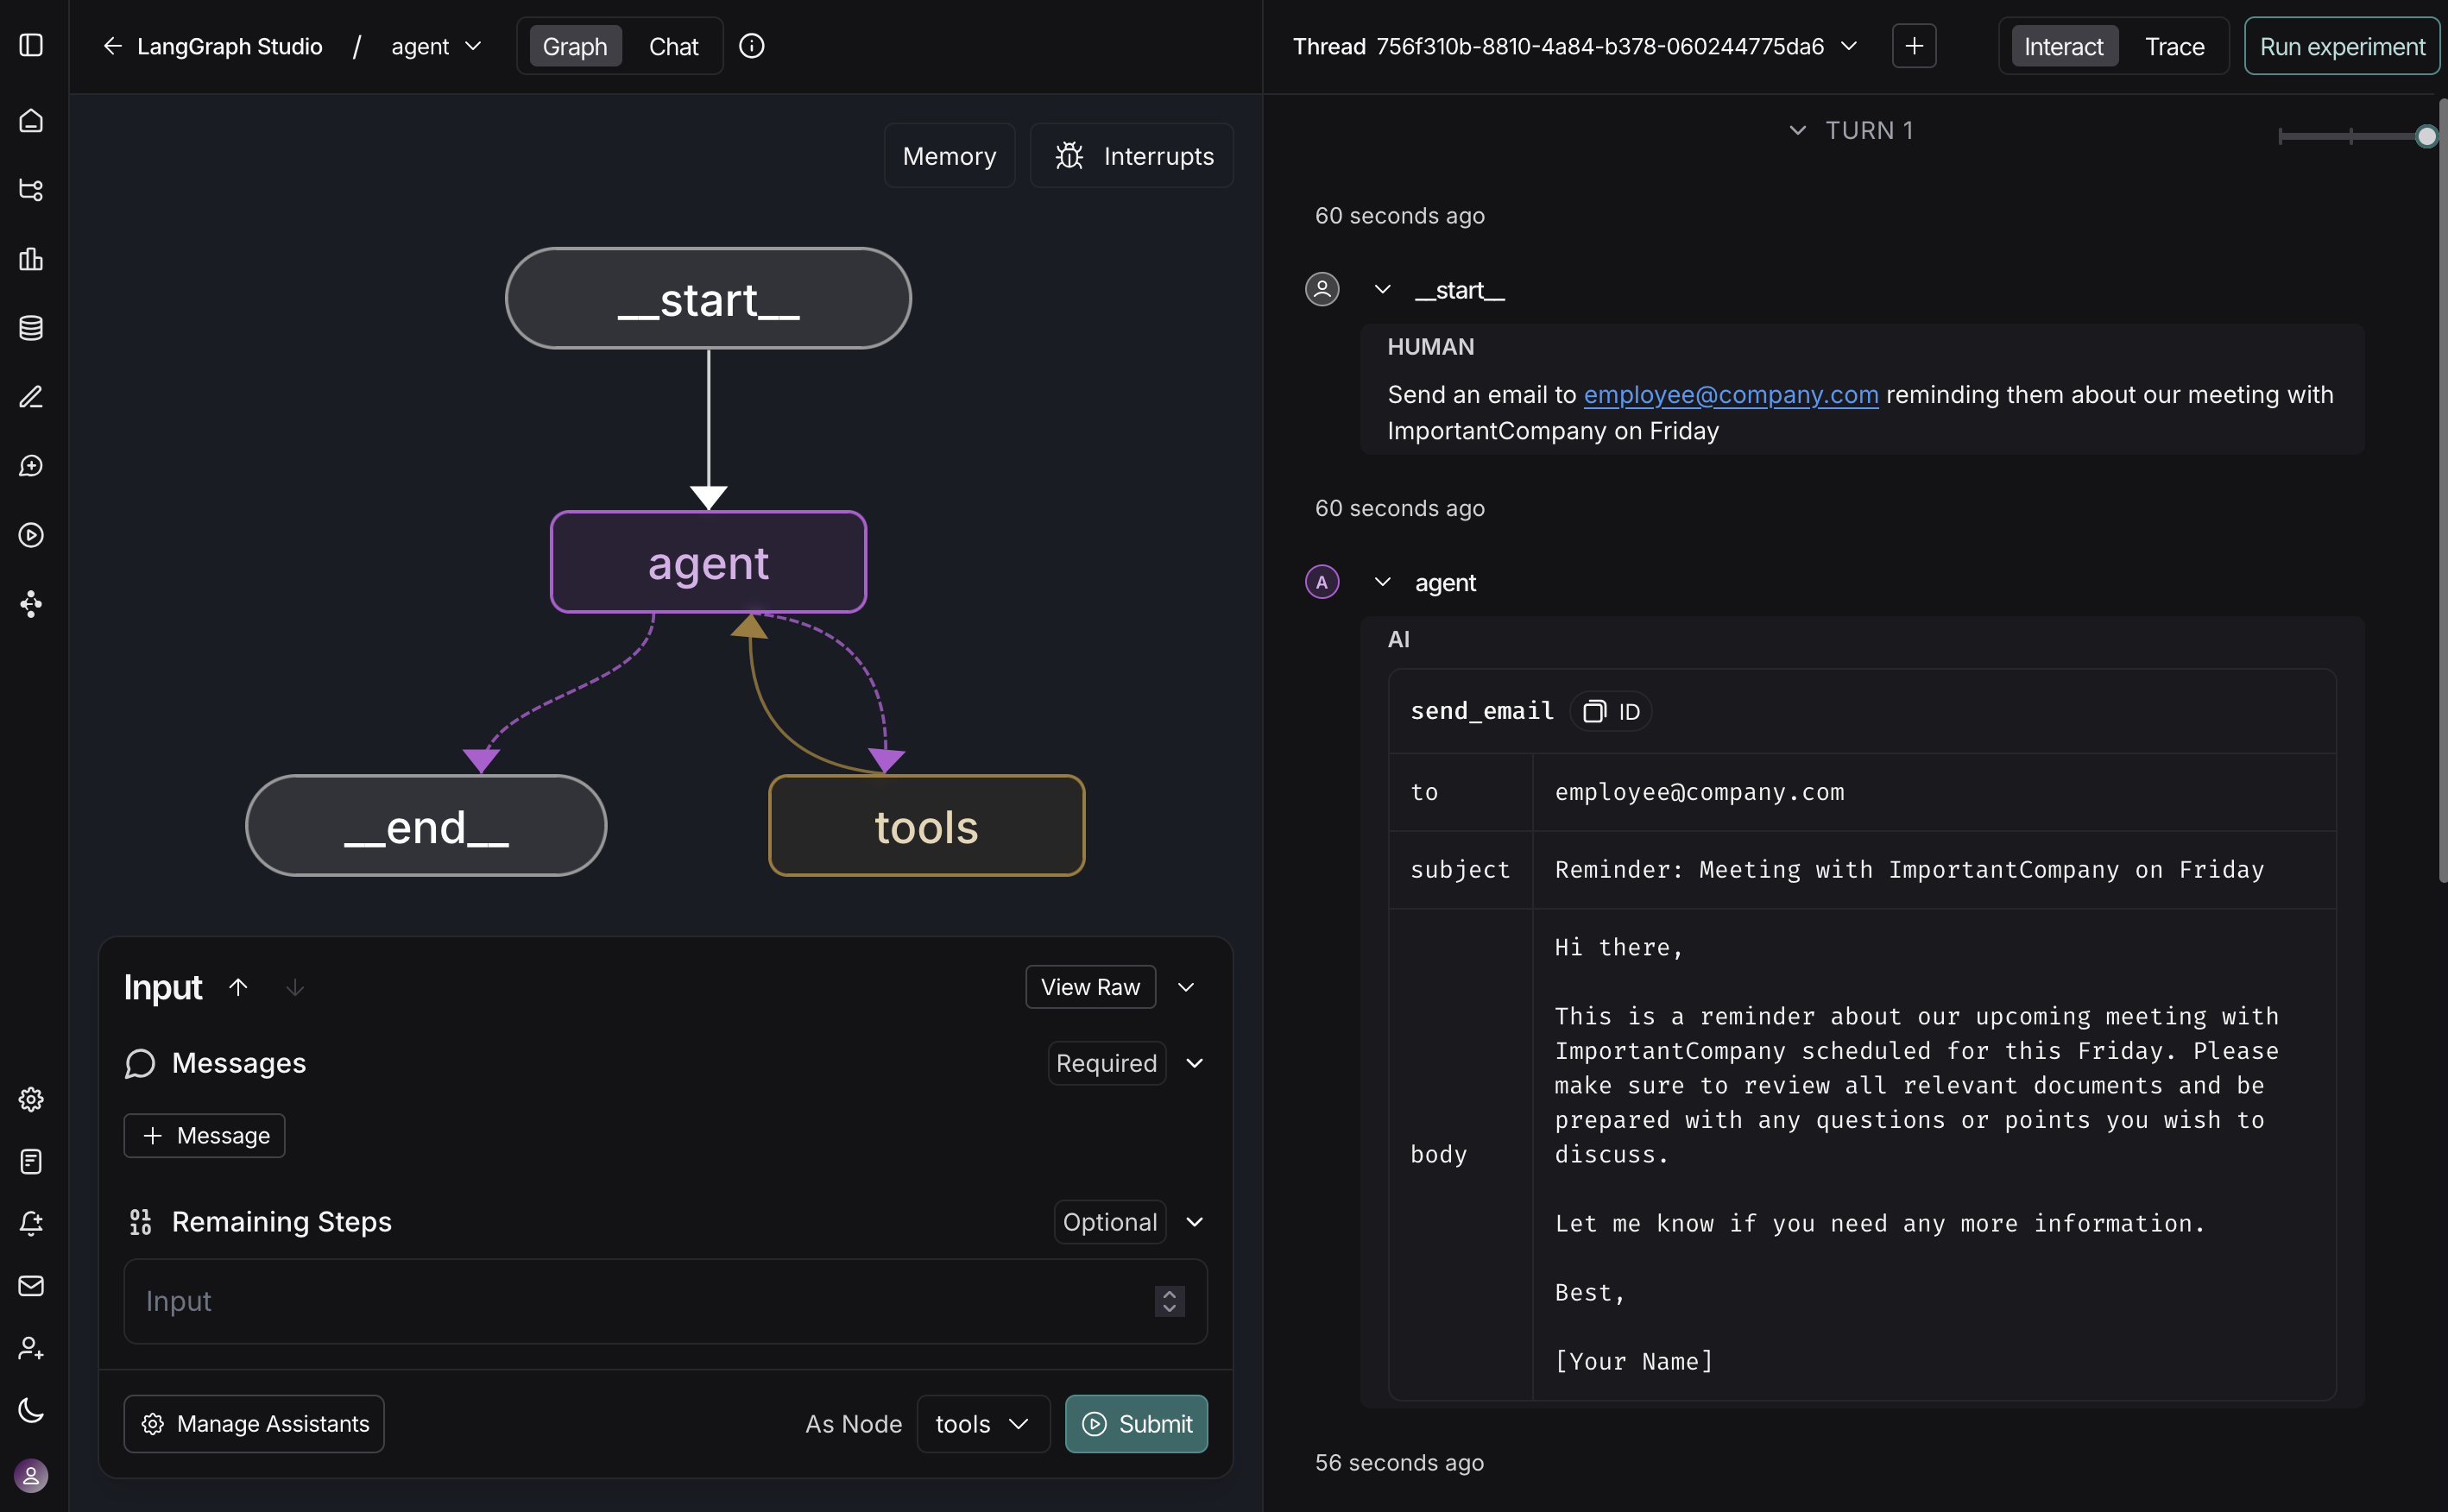
For an in-depth look at Studio, check out the overview page.
For more information about local and deployed agents, see Set up local LangGraph Server and Deploy.
Connect these docs programmatically to Claude, VSCode, and more via MCP for real-time answers.